網頁設計好好玩
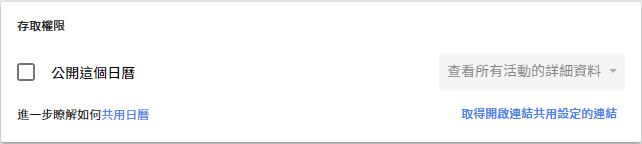
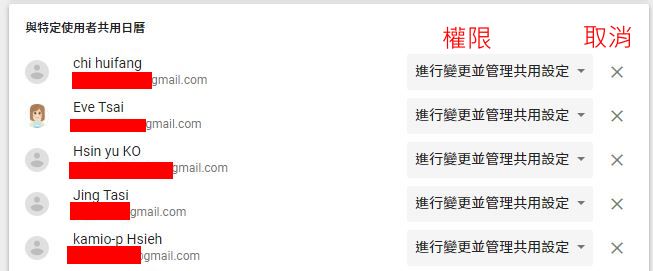
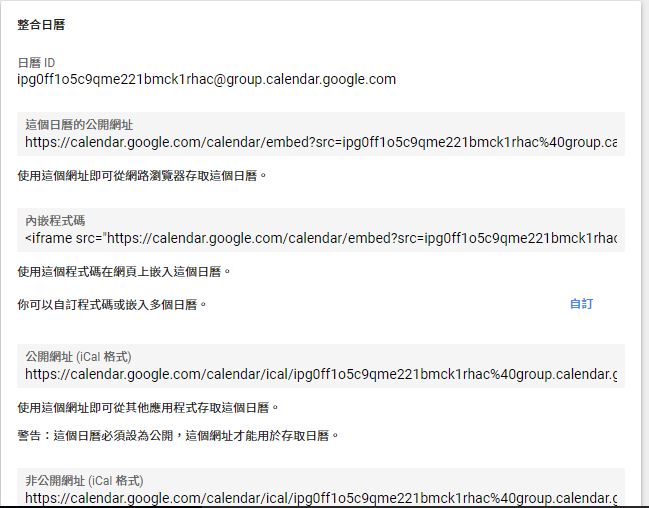
1-1 GitHub建立repository
GitHub建立repository
GitHub建立repository
Bootstrap 是一個用於開發 HTML、CSS 和 JS 的開源工具包。 透過我們的 Sass 和 mixins、響應式網格系統、預先建構的組件以及基於 jQuery 開發的插件來 快速建構你的想法或是應用程式!
<!DOCTYPE HTML>
<html lang="zh-Hant-TW">
  <head>
    <!--必需的 meta tag -->
    <meta charset="utf-8">
    <meta name="viewport" content="width=device-width, initial-scale=1, shrink-to-fit=no">

    <!-- Bootstrap CSS -->
    <link rel="stylesheet" href="https://maxcdn.bootstrapcdn.com/bootstrap/4.0.0/css/bootstrap.min.css" integrity="sha384-Gn5384xqQ1aoWXA+058RXPxPg6fy4IWvTNh0E263XmFcJlSAwiGgFAW/dAiS6JXm" crossorigin="anonymous">

    <title>Hello, world!</title>
  </head>
  <body>
    <h1>Hello, world!</h1>

    <!-- Optional JavaScript -->
    <!-- jQuery first, then Popper.js, then Bootstrap JS -->
    <script src="https://code.jquery.com/jquery-3.2.1.slim.min.js" integrity="sha384-KJ3o2DKtIkvYIK3UENzmM7KCkRr/rE9/Qpg6aAZGJwFDMVNA/GpGFF93hXpG5KkN" crossorigin="anonymous"></script>
    <script src="https://cdnjs.cloudflare.com/ajax/libs/popper.js/1.12.9/umd/popper.min.js" integrity="sha384-ApNbgh9B+Y1QKtv3Rn7W3mgPxhU9K/ScQsAP7hUibX39j7fakFPskvXusvfa0b4Q" crossorigin="anonymous"></script>
    <script src="https://maxcdn.bootstrapcdn.com/bootstrap/4.0.0/js/bootstrap.min.js" integrity="sha384-JZR6Spejh4U02d8jOt6vLEHfe/JQGiRRSQQxSfFWpi1MquVdAyjUar5+76PVCmYl" crossorigin="anonymous"></script>
  </body>
</html>
HTML 是用來描述網頁的一種語言。
HTML 標記標籤通常被稱為HTML 標籤(HTML tag)。
Web 瀏覽器的作用是讀取HTML 文檔,並以網頁的形式顯示出它們。瀏覽器不會顯示HTML 標籤,而是使用標籤來解釋頁面的內容:
<html>
<body>

<h1>我的第一個標題</h1>

<p>我的第一個段落。</p>

</body>
</html>
一、標題
<h1> 到 <h6> 均可用。
<h1>h1. Bootstrap heading</h1>
<h2>h2. Bootstrap heading</h2>
<h3>h3. Bootstrap heading</h3>
<h4>h4. Bootstrap heading</h4>
<h5>h5. Bootstrap heading</h5>
<h6>h6. Bootstrap heading</h6>
.h1 到 .h6 的 Class,因為當你想匹配某一標題的字體樣式,但不能直接使用 HTML 元素時。
<p class="h1">h1. Bootstrap heading</p>
<p class="h2">h2. Bootstrap heading</p>
<p class="h3">h3. Bootstrap heading</p>
<p class="h4">h4. Bootstrap heading</p>
<p class="h5">h5. Bootstrap heading</p>
<p class="h6">h6. Bootstrap heading</p>
<h1 class="display-1">Display 1</h1>
<h1 class="display-2">Display 2</h1>
<h1 class="display-3">Display 3</h1>
<h1 class="display-4">Display 4</h1>
當同一個HTML 元素被不止一個樣式定義時,會使用哪個樣式呢?
一般而言,所有的樣式會根據下面的規則層疊於一個新的虛擬樣式表中,其中數字4 擁有最高的優先權。
因此,內聯樣式(在HTML 元素內部)擁有最高的優先權,這意味著它將優先於以下的樣式聲明:<head> 標籤中的樣式聲明,外部樣式表中的樣式聲明,或者瀏覽器中的樣式聲明(預設值)。
容器是 Bootstrap 最基本的排版元素,且 當使用我們的網格系統時 是必須的。從響應式、固定寬度容器(表示其最大寬度限制在每一個中斷點)或可變寬度(顯示為 100% 寬)中選擇。
.container-fluid。.container。 <div class="container"> ... </div>
<div class="container-fluid">
  ...
</div>
Bootstrap4 為行動優先的架構,所以預設的斷點為 (xs)
// Extra small devices (portrait phones, less than 576px)
// No media query since this is the default in Bootstrap

// Small devices (landscape phones, 576px and up) (sm)(橫的手機)
@media (min-width: 576px) { ... }

// Medium devices (tablets, 768px and up) (md)(平板)
@media (min-width: 768px) { ... }

// Large devices (desktops, 992px and up) (lg)(桌機)
@media (min-width: 992px) { ... }

// Extra large devices (large desktops, 1200px and up) (xl)(較大的桌機)
@media (min-width: 1200px) { ... }
<div class="mx-auto mt-5 p-5 bg-primary" style="width: 200px;">
  mx-auto:代表水平的margin會自動均分
</div>
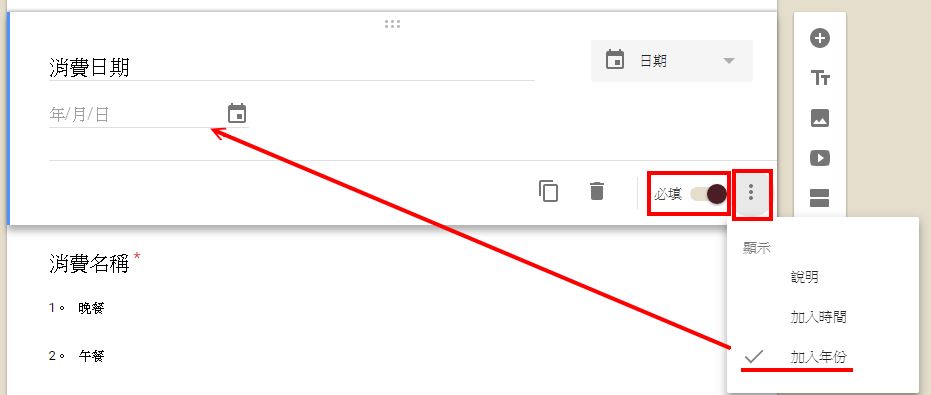
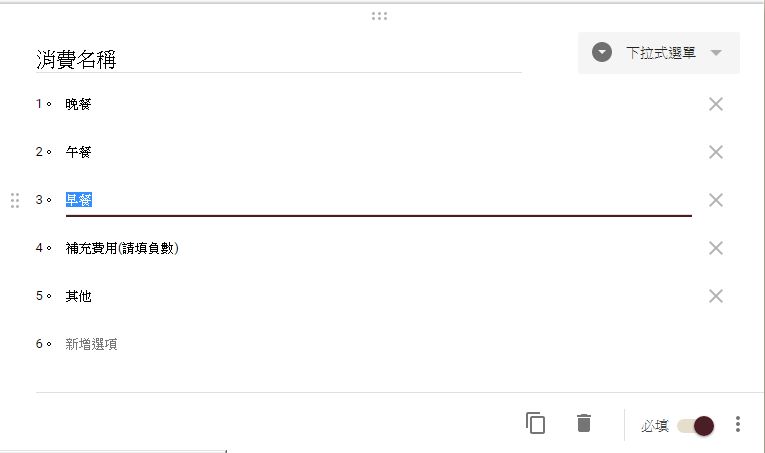

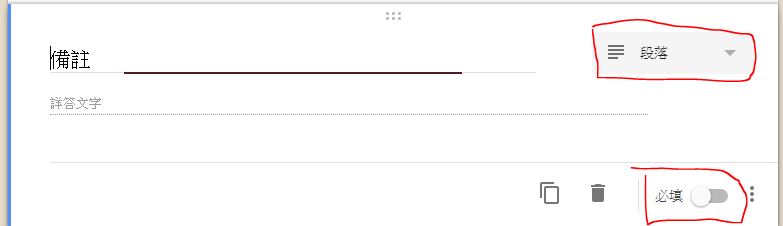
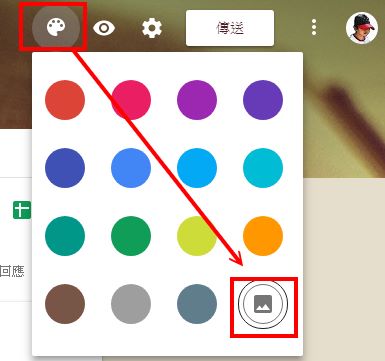
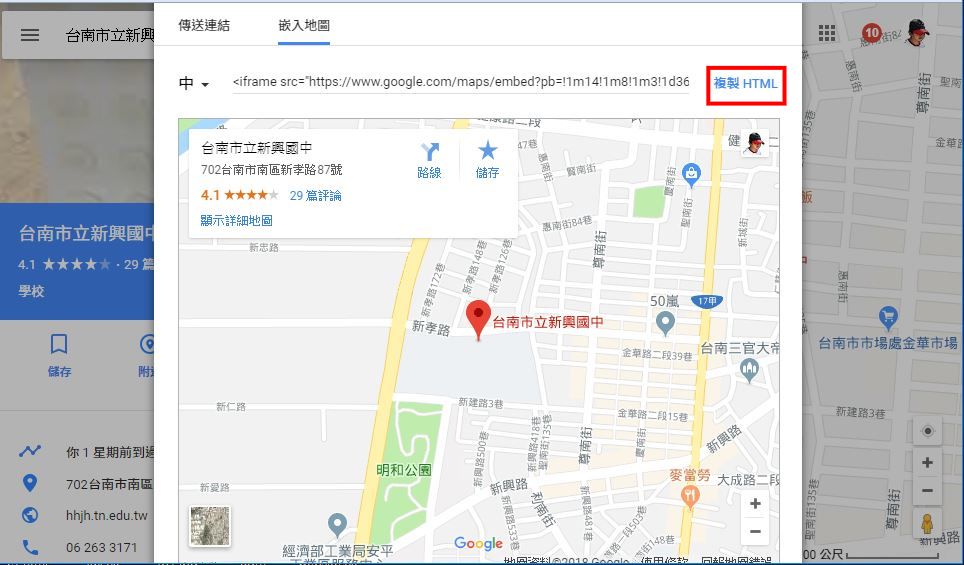
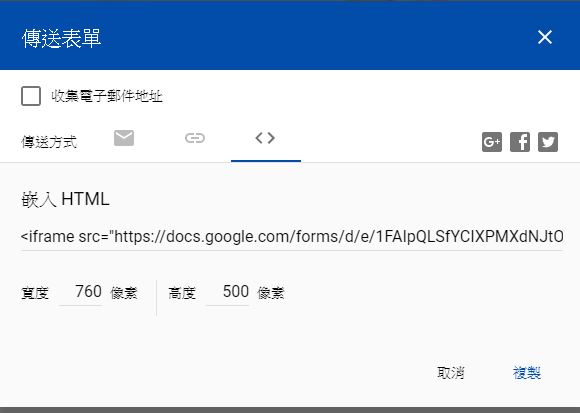
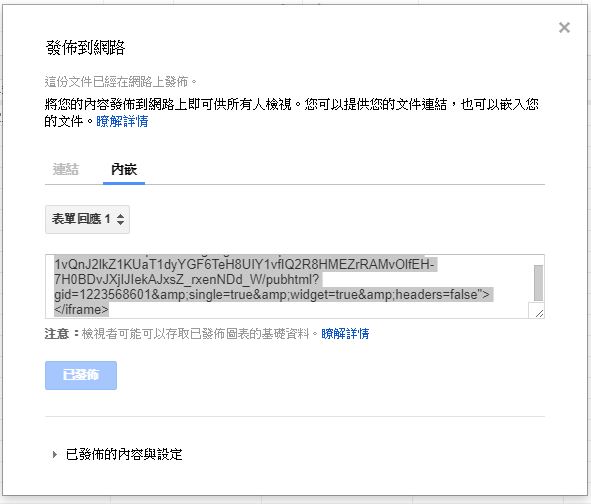
一、取得Google表單嵌入碼

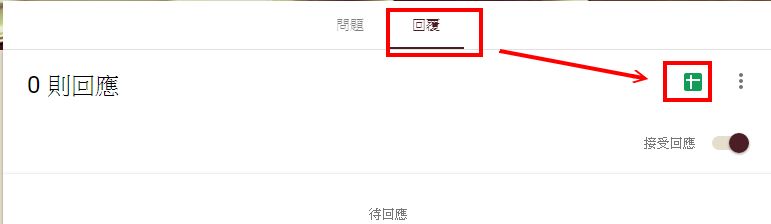
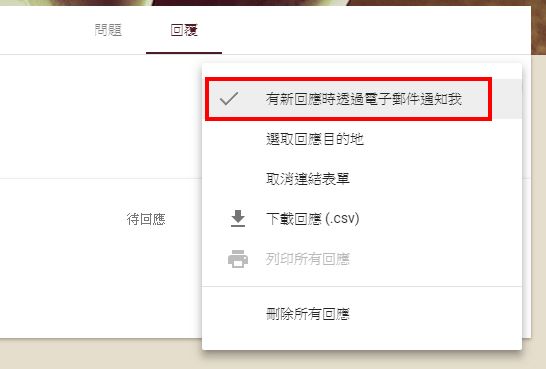
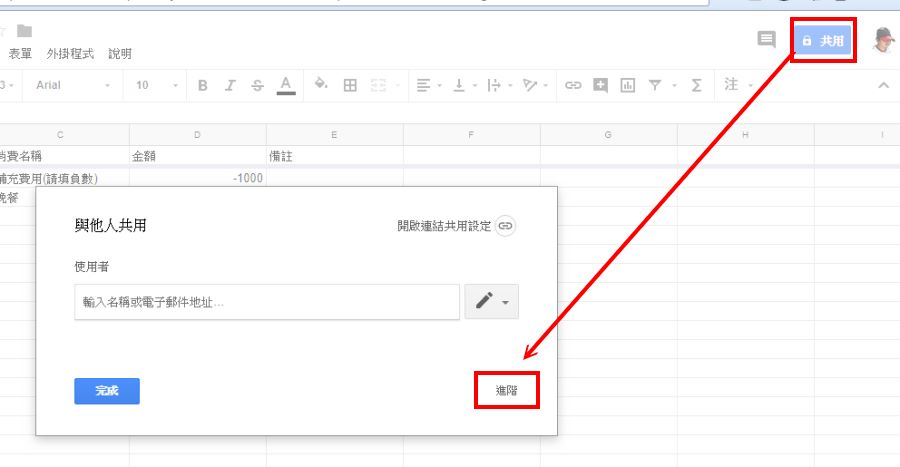
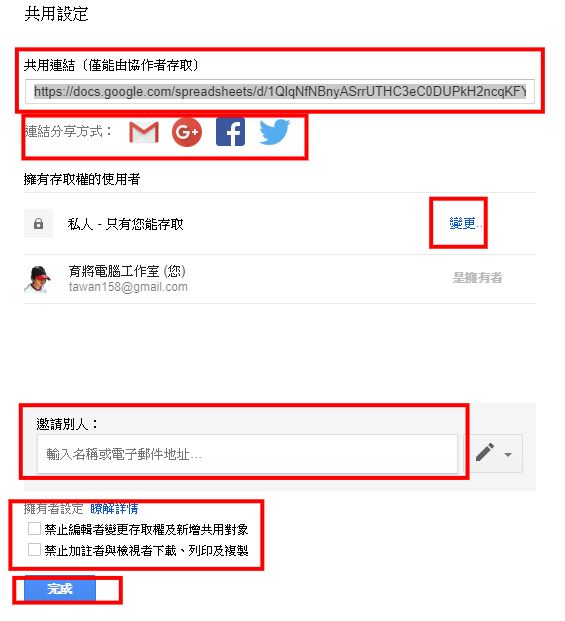
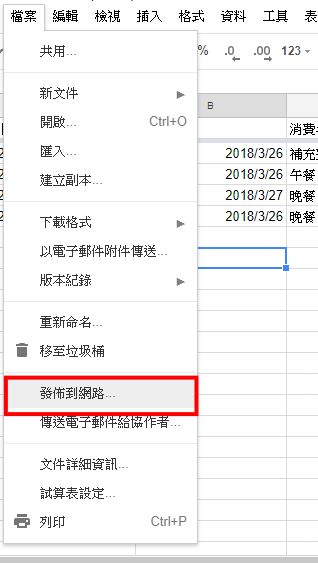
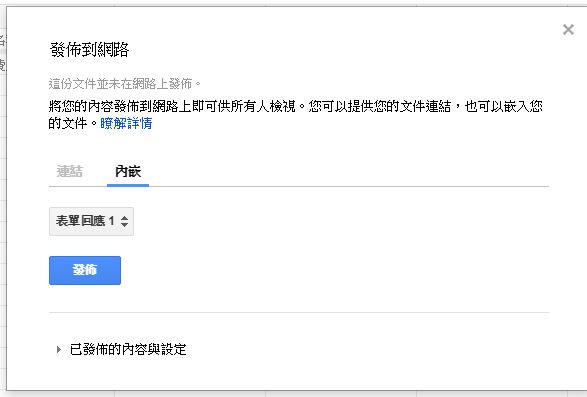
二、取得Google試算表嵌入碼


 44
44三、將嵌入碼放入Bootstrap4 容器
一、介紹
二、練習
三、其他
20180402.html
    <h1>20180402 嵌入Google表單</h1>
    <div class="container">
      <div class="row">
        <div class="col">
          <div>

          </div>
        </div>
        <div class="col">
          <div>

          </div>
        </div>
      </div>
    </div>
    <h1>20180402 嵌入Google表單</h1>
    <div class="container">
      <div class="row">
        <div class="col border border-primary">
          <div style="height: 500px;">

          </div>
        </div>
        <div class="col border border-success">
          <div style="height: 500px;">

          </div>
        </div>
      </div>
    </div>
完成
<!DOCTYPE HTML>
<html lang="zh-Hant-TW">
<head>
<!--必需的 meta tag -->
<meta charset="utf-8">
<meta name="viewport" content="width=device-width, initial-scale=1, shrink-to-fit=no">
<!-- Bootstrap CSS -->
<link rel="stylesheet" href="https://maxcdn.bootstrapcdn.com/bootstrap/4.0.0/css/bootstrap.min.css" integrity="sha384-Gn5384xqQ1aoWXA+058RXPxPg6fy4IWvTNh0E263XmFcJlSAwiGgFAW/dAiS6JXm" crossorigin="anonymous">
<title>20180402</title>
</head>
<body>
<h1 class="text-center">20180402 嵌入Google表單</h1>
<div class="container">
<div class="row">
<div class="col">
<div>
<iframe src="https://docs.google.com/forms/d/e/1FAIpQLSfYCIXPMXdNJtOn4QTo5HCzgKOeuMAInnBYPouj3vCXEqvztg/viewform?embedded=true" width="100%" height="1100" frameborder="0" marginheight="0" marginwidth="0">載入中…</iframe>
</div>
</div>
<div class="col">
<div>
<iframe src="https://docs.google.com/spreadsheets/d/e/2PACX-1vQnJ2lkZ1KUaT1dyYGF6TeH8UIY1vfIQ2R8HMEZrRAMvOlfEH-7H0BDvJXjIJIekAJxsZ_rxenNDd_W/pubhtml?gid=1223568601&single=true&widget=true&headers=false" style="width: 100%;height: 1100px;"></iframe>
</div>
</div>
</div>
</div>
<!-- Optional JavaScript -->
<!-- jQuery first, then Popper.js, then Bootstrap JS -->
<script src="https://code.jquery.com/jquery-3.2.1.slim.min.js" integrity="sha384-KJ3o2DKtIkvYIK3UENzmM7KCkRr/rE9/Qpg6aAZGJwFDMVNA/GpGFF93hXpG5KkN" crossorigin="anonymous"></script>
<script src="https://cdnjs.cloudflare.com/ajax/libs/popper.js/1.12.9/umd/popper.min.js" integrity="sha384-ApNbgh9B+Y1QKtv3Rn7W3mgPxhU9K/ScQsAP7hUibX39j7fakFPskvXusvfa0b4Q" crossorigin="anonymous"></script>
<script src="https://maxcdn.bootstrapcdn.com/bootstrap/4.0.0/js/bootstrap.min.js" integrity="sha384-JZR6Spejh4U02d8jOt6vLEHfe/JQGiRRSQQxSfFWpi1MquVdAyjUar5+76PVCmYl" crossorigin="anonymous"></script>
</body>
</html>

<!-- Footer -->
<footer class="footer text-center">
<div class="container">
<div class="row">
<div class="col-sm-8 offset-sm-2">
.....
</div>
</div>
<p class="text-muted small mb-0">Copyright © Your Website 2018</p>
</div>
</footer>
<!DOCTYPE html>
<html lang="zh-Hant-TW">
  <head>
    <!-- Required meta tags -->
    <meta charset="utf-8">
    <meta name="viewport" content="width=device-width, initial-scale=1, shrink-to-fit=no">

    <!-- Bootstrap CSS -->
    <link rel="stylesheet" href="css/bootstrap.min.css">

    <!-- jQuery first, then Popper.js, then Bootstrap JS -->
    <script src="js/jquery-3.3.1.min.js"></script>
    <script src="js/popper.min.js"></script>
    <script src="js/bootstrap.min.js"></script>

    <title>Bootstrap 離線版</title>
  </head>
  <body>

  </body>
</html>
    <div class="container my-5">
      <h1 class="text-center">入口網站</h1>
      <table class="table table-hover table-bordered">
        <thead>
          <tr>
            <th class="text-center" scope="col" style="width:10%">#</th>
            <th class="text-center" scope="col" style="width:20%">網站名稱</th>
            <th class="text-center" scope="col">網站</th>
          </tr>
        </thead>
        <tbody>
          <tr>
            <th class="text-center align-middle" scope="row">0</th>
            <td class="text-center align-middle" >育將電腦工作室</td>
            <td class="text-center align-middle" >
              <a href="web/index.html" target="_blank">
                <img src="....">
              </a>
            </td>
          </tr>
        </tbody>
      </table>
    </div>